Find and Replace: the Zed Way
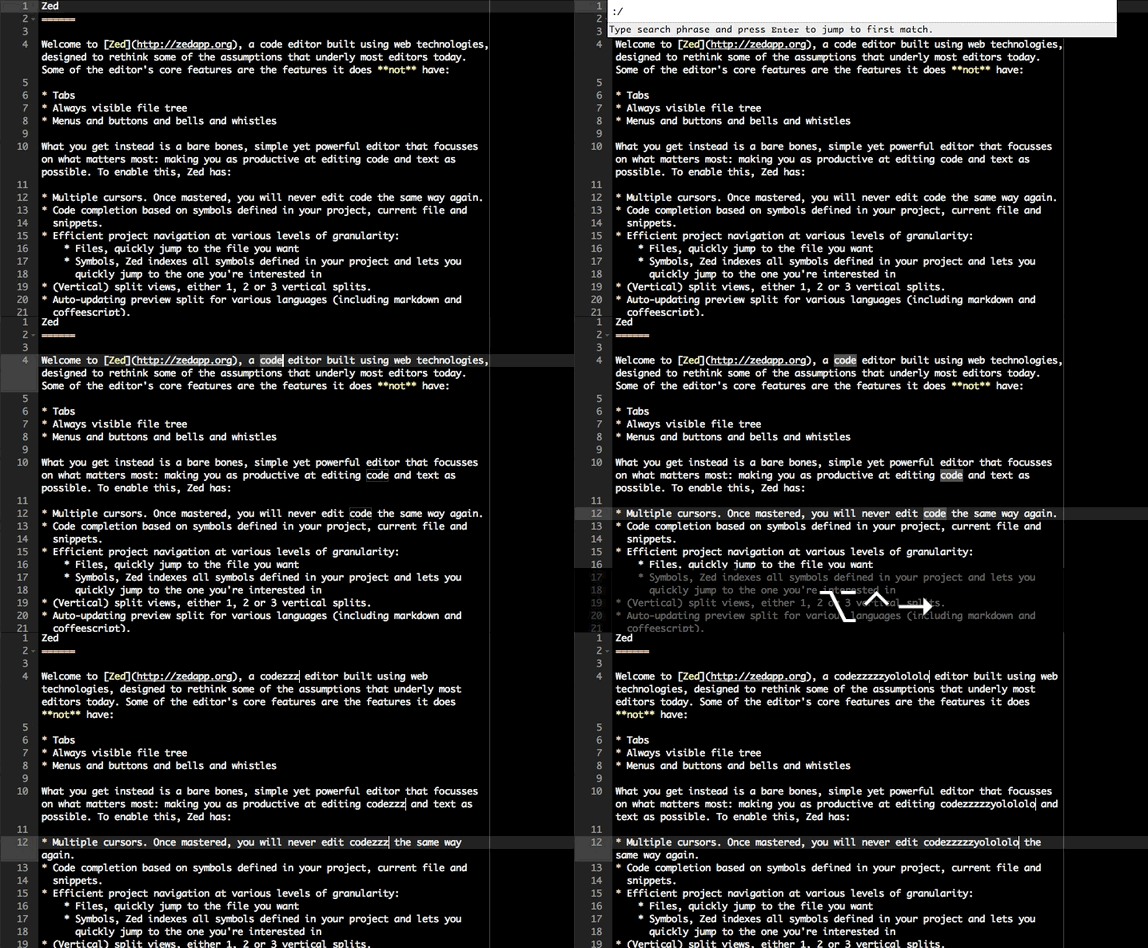
Most editors got their find & replace features before the advent of multiple cursors. In Zed, multiple cursors are core to your editing experience: they're used to quickly apply edits on multiple locations simultaneously, for instance, to emulate a traditional editor's find & replace functionality.
But before we get to the replace aspect, let's have a look at how to use use Zed's find features first.
Find in file
The Find:Find command (Command-F/Ctrl-F), brings up the goto UI prefixed with :/ which signifies (incremental) search in file. Enter you phrase and press enter to jump to the first match, then to jump to the next match (with the match still selected) use the Find:Next command (Command-G/Ctrl-K), or Find:Previous (Command-Shift-G/Ctrl-Shift-K) to jump to the previous match. To jump to other instances of the identifier under the cursor use Command-[/Ctrl-[ (previous instance) and Command-]/Ctrl-] (next instance).
Find and replace
To replace text, we use multiple cursors:
- Select the phrase you want to replace (e.g. via search, followed by
Enterto put focus back on the editor) - Add cursors to however many instances of that phrase as you want via
Ctrl-Alt-Right(add the instance to the "right" -- after the current selection) and/orCtrl-Alt-Left(add to the left). Or, to put cursors on all instances at once, useFind:All(Ctrl-Alt-F). - Start making your changes! The change will be applied at all locations.

Find in project
Zed also has basic find in project functionality (no replace in project yet) via Find:Find in Project (Command-Shift-F/Ctrl-Shift-F).
